Course Overview
Designed by Tony Cashmore, the McCracken Golf Course offers coastal breezes and elevated fairways. The par 72 course features 74 bunkers and water in play on several holes with 14 lakes constructed within a beautiful setting of natural watercourses and gentle slopes.
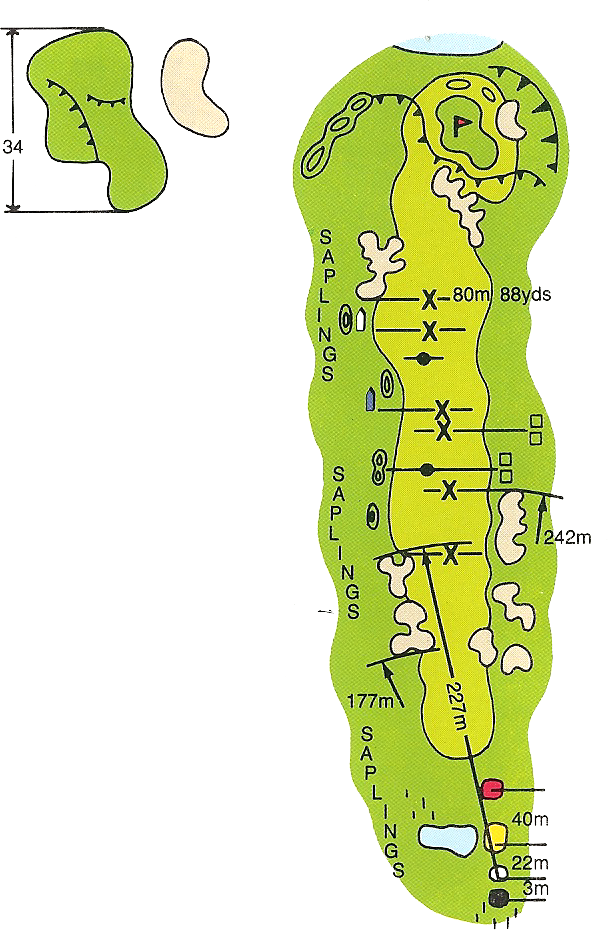
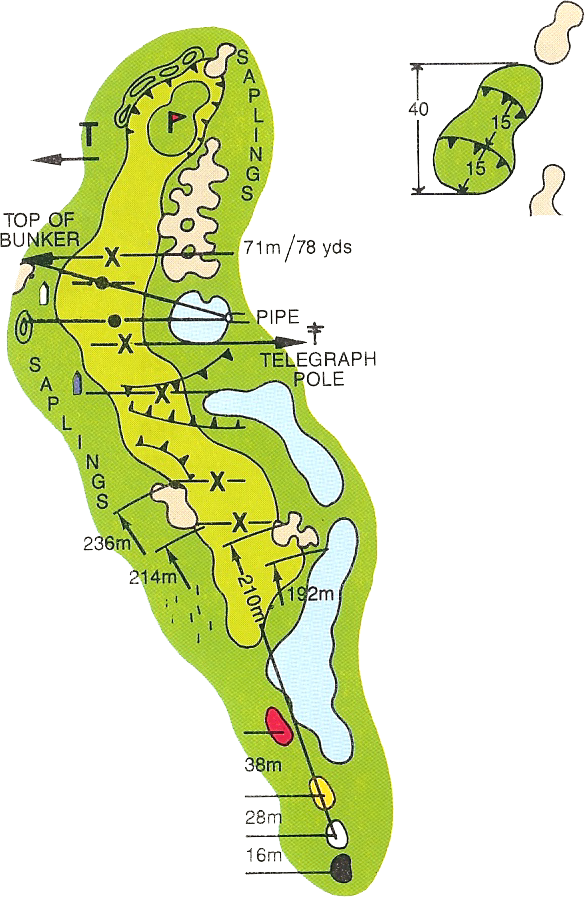
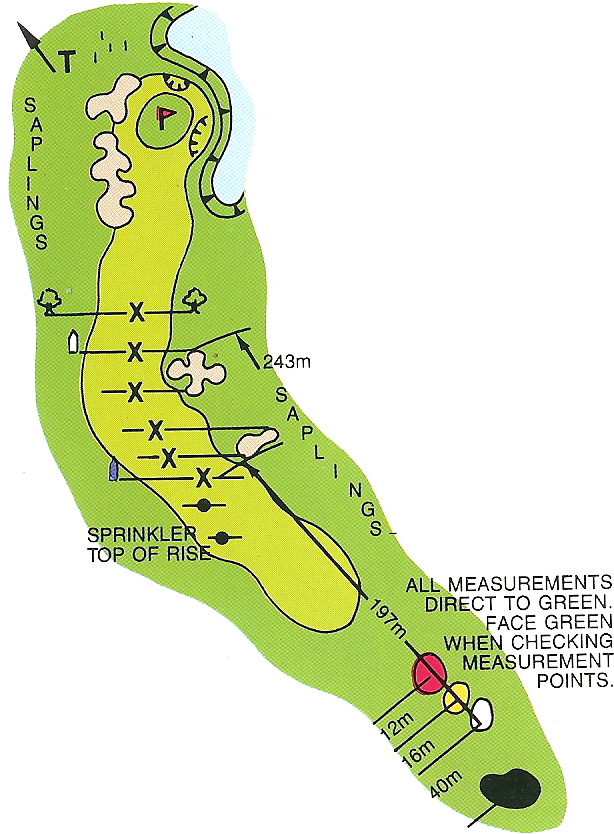
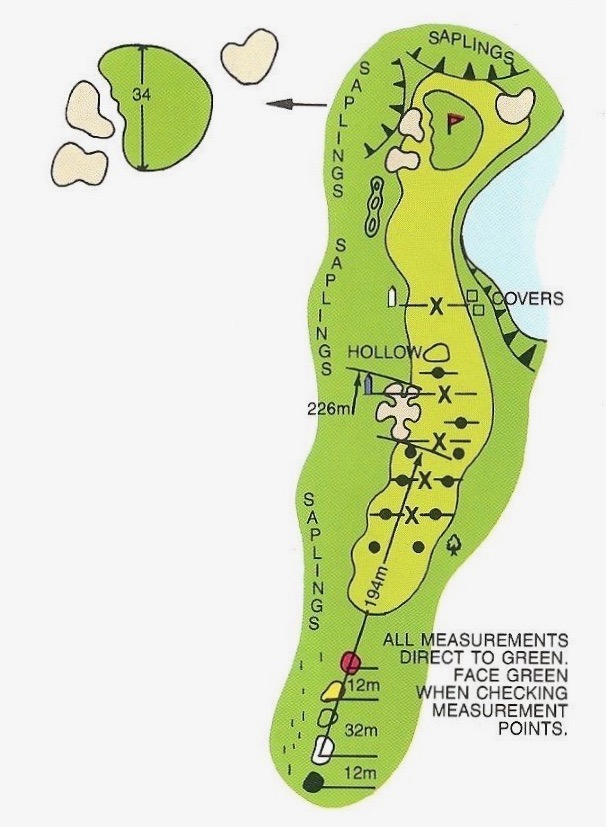
Hole 1
W: Par 5 – 440 M – Index 5
M: Par 5 – 482 M – Index 7
Bunkers in range especially down-wind, consider a fairway wood to start with.
A layup second shot to the left of fairway is the safety line; long hitters beware water left and right.
Bunkers back of green will grap an overhit third shot.
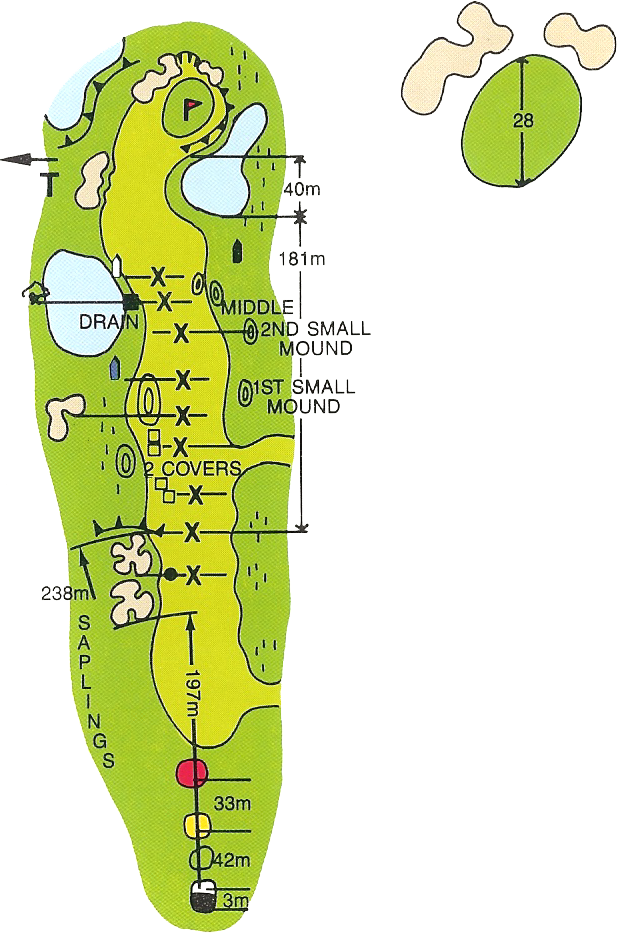
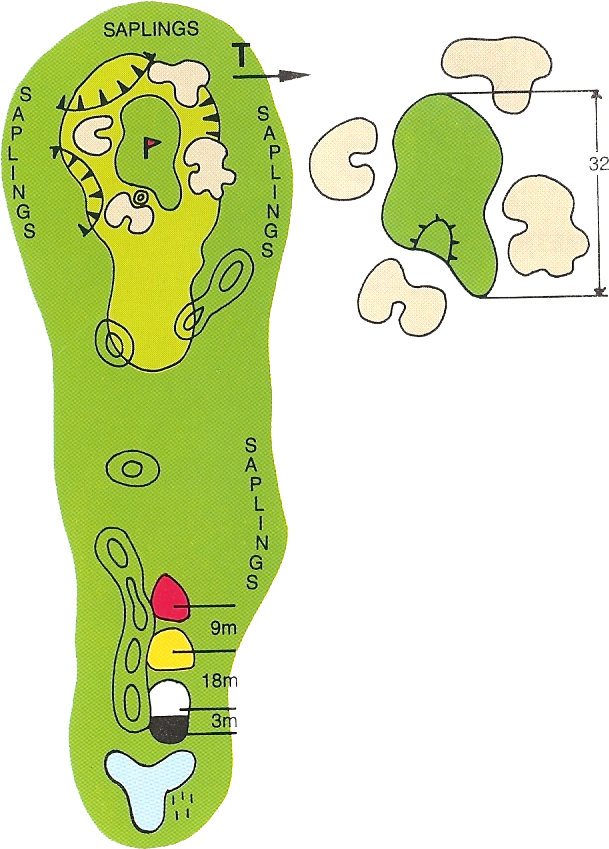
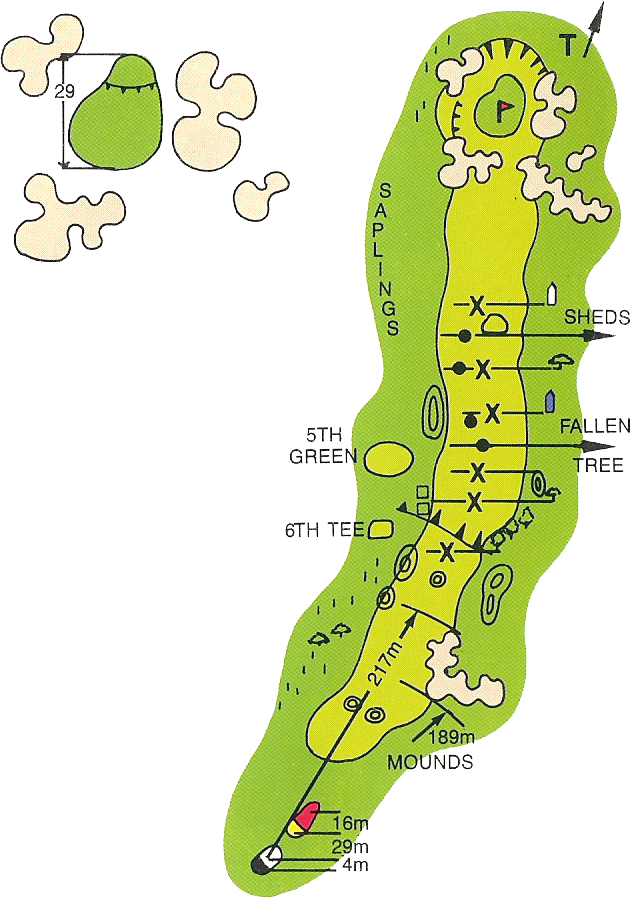
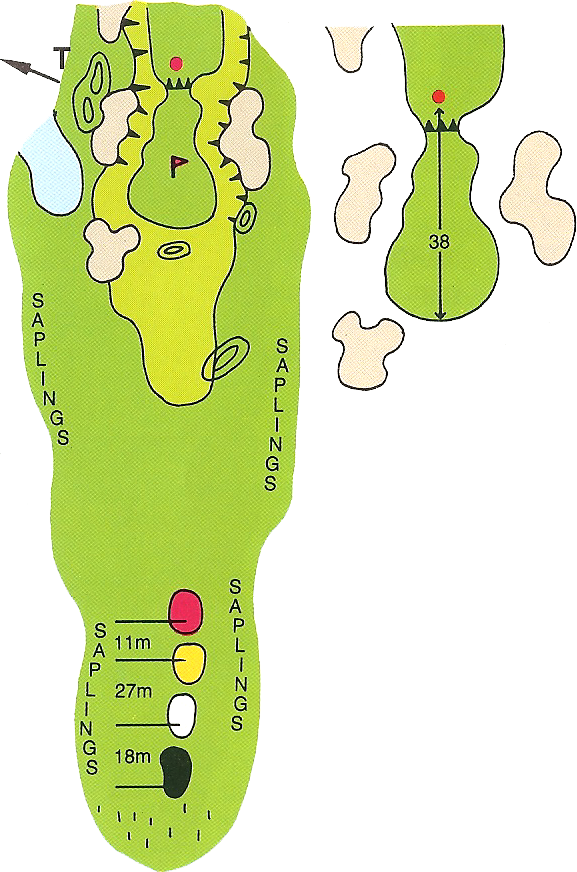
Hole 2
W: Par 3 – 132 M – Index 17
M: Par 3 – 186 M – Index 5
The summer sou’easter can toughen this hole.
Sand left and water front and right of green.
Select your most trusty fairway wood or long iron for a straight tee shot. Safer long than short.
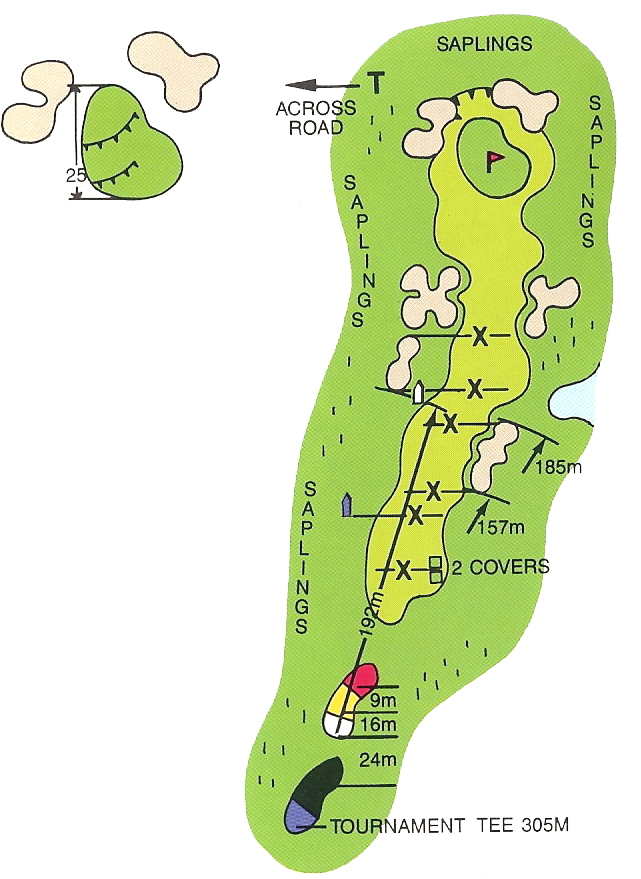
Deep swale mid green complicates the putt.
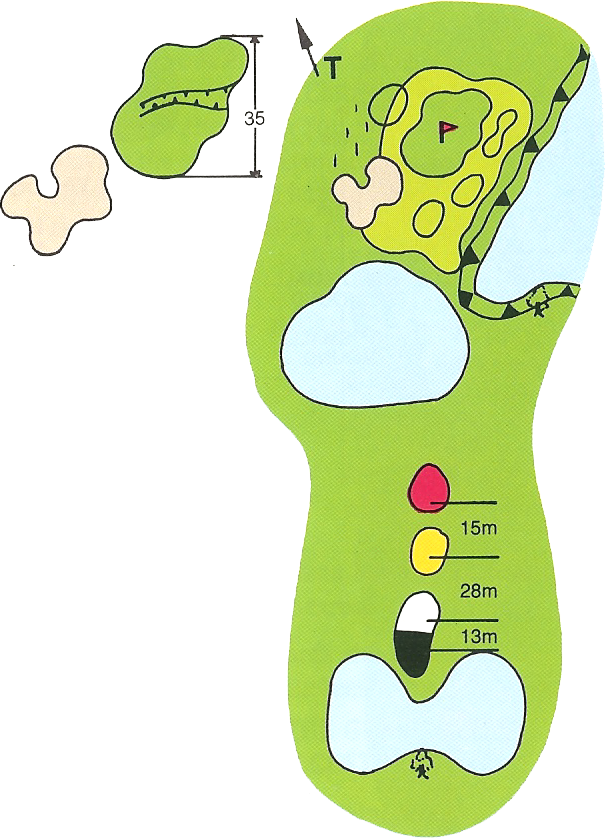
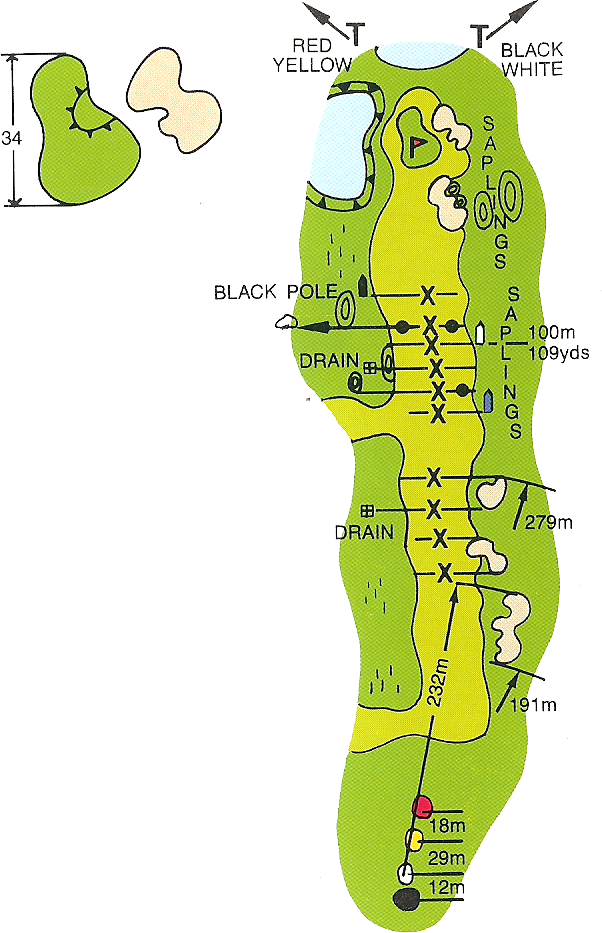
Hole 3
W: Par 4 – 289 M – Index 3
M: Par 4 – 363 M – Index 1
Water all down the right is in range, a fairway wood tee shot left centre of fairway is safest, slope will middle the ball and give extra roll.
Bunker left catches a hook.
Hitting in to left of the green avoids the bunker on the front right.
Tough putting green – many borrows and swales.
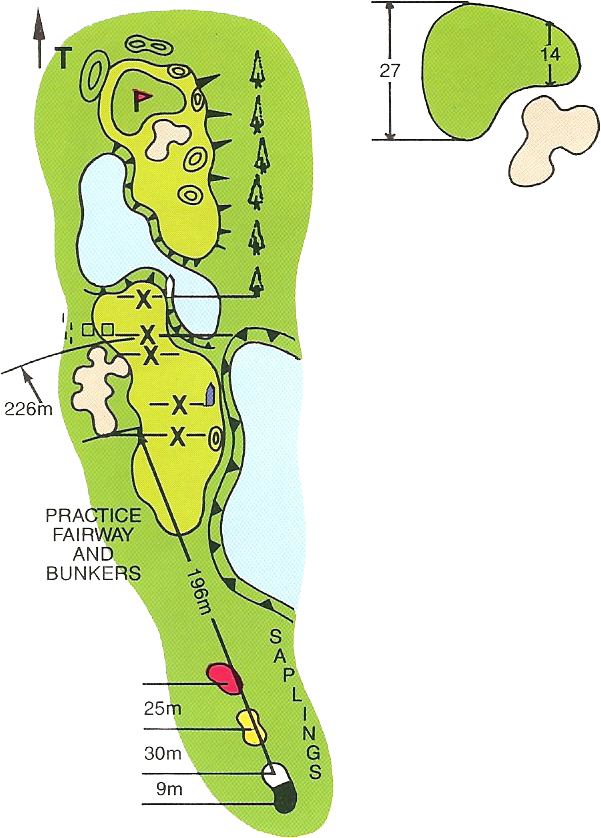
Hole 4
W: Par 5 – 371 M – Index 11
M: Par 5 – 455 M – Index 17
Driving line is the left centre fairway, bunkers hard to reach from back tees.
2nd shot to left fairway avoids a huge, fierce bunker on the right leaving a short iron or pitch in.
Note pin position; a 3 tier green can cause a putting disaster if on the wrong level.
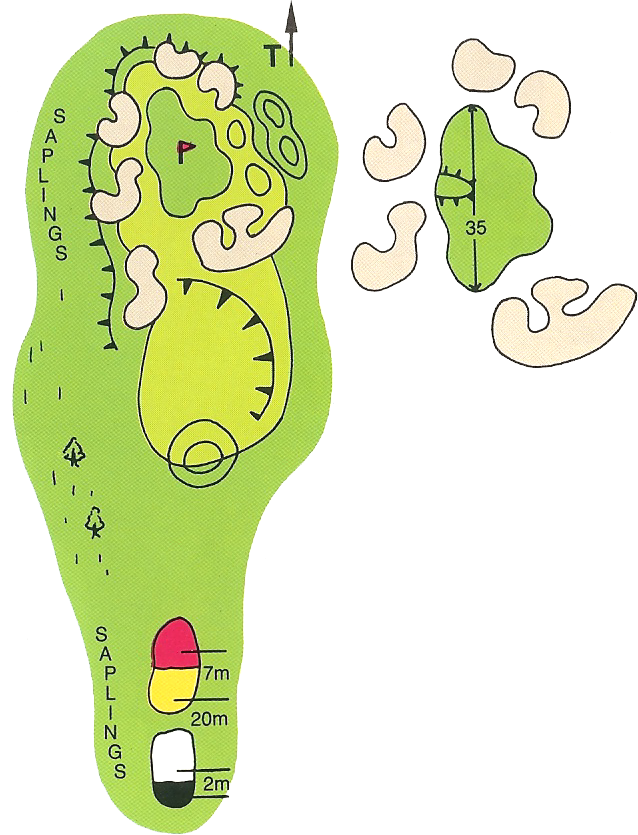
Better short than long.
Hole 5
W: Par 3 – 143 M – Index 13
M: Par 3 – 182 M – Index 9
A par on this hole and you have done well.
Carefully check wind and daily tee position before club selection.
With bunkers surrounding the green go for the centre and rely on two putts.
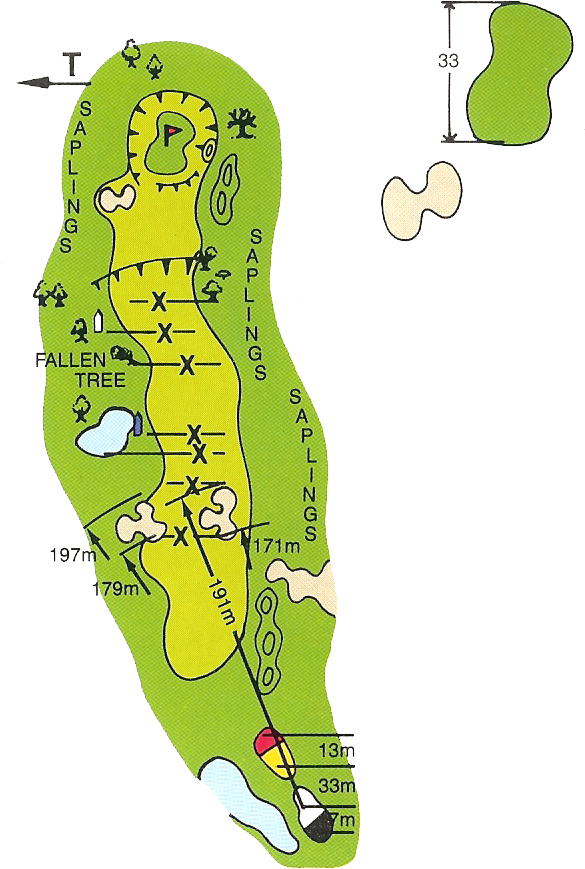
Hole 6
W: Par 4 – 260 M – Index 9
M: Par 4 – 296 M – Index 14
Left fairway is the driving line, the ball will kick back to the middle and roll on.
Make allowances for line and take a good stance for the second shot.
Green slopes back to front.
Plan to putt uphill.
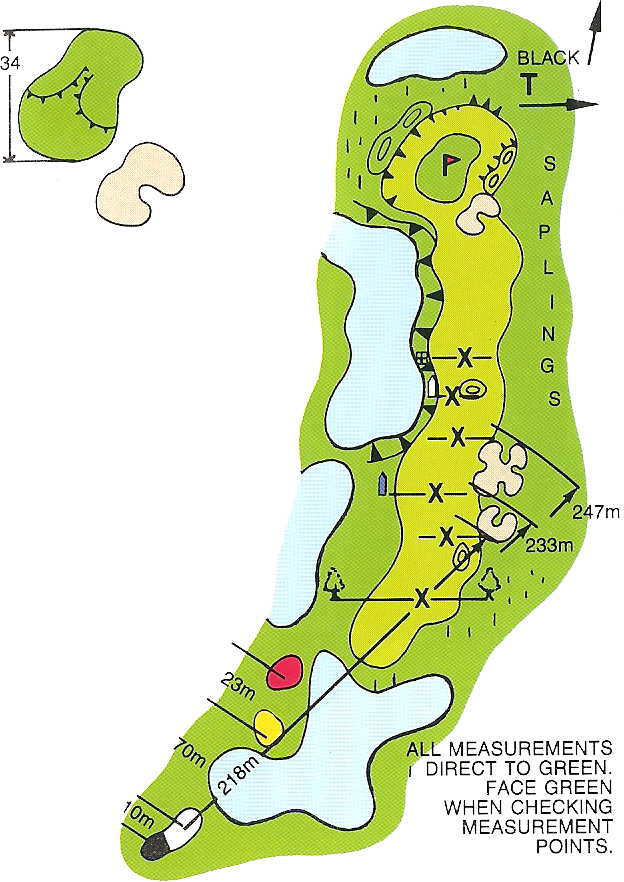
Hole 7
W: Par 3 – 115 M – Index 15
M: Par 3 – 135 M – Index 13
A short par 3 but hard to judge the shot to this elevated green.
Check the wind and the day’s tee position carefully.
Bunkers all around green make correct club selection essential.
Two grassy hollows right are a better option.
Hole 8
W: Par 5 – 458 M – Index 7
M: Par 5 – 494 M – Index 11
Driving line is left of the olive tree to lthe crest of the hill.
A layup second shot takes the bunkers out of play.
Third shot is on 2 tiered green.
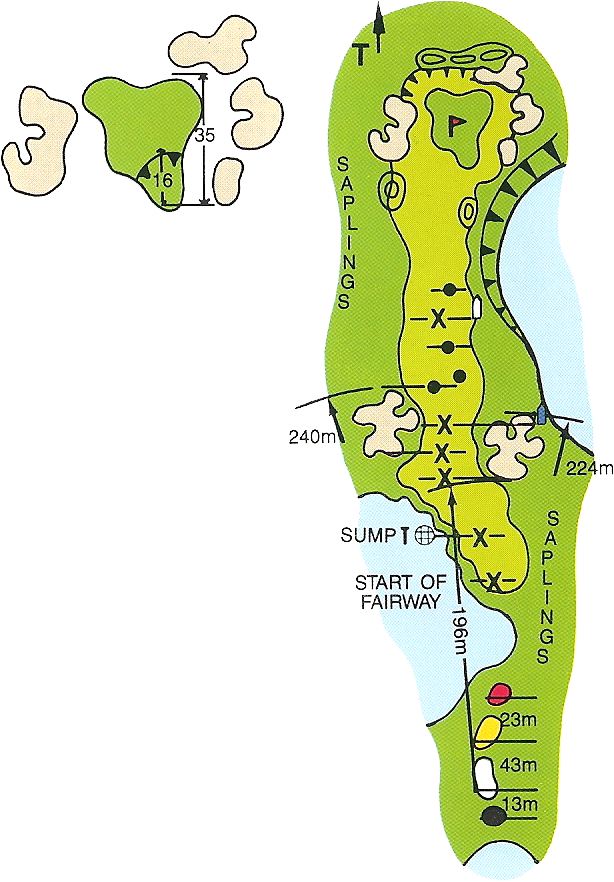
Hole 9
W: Par 4 – 323 M – Index 1
M: Par 4 – 373 M – Index 3
Hard to clear the bunkers into wind from the back tees, safer to lay up left of mid-fairway bunkers.
Line to centre green is just left of big tree on the right.
With a sloping back to front green and an approach shot needs AT LEAST one extra club.
Hole 10
W: Par 5 – 413 M – Index 14
M: Par 5 – 473 M – Index 18
Bunkers are in range off the tee, the driving line is left centre fairway.
After a good drive and with helping wind this green is reachable in two but the water left is a danger.
A prominent rise centre green can complicate your putt.
Hole 11
W: Par 4 – 286 M – Index 8
M: Par 4 – 374 M – Index 4
Drive right between the trees with a draw if possible, bunkers can be in range, consider a fairway wood.
Check distance carefully for your 2nd, ‘dead ground’ illusion can cause underclubbing.
With the pin back right, centre green is safest.
Slopes kick ball back to green if hit left.
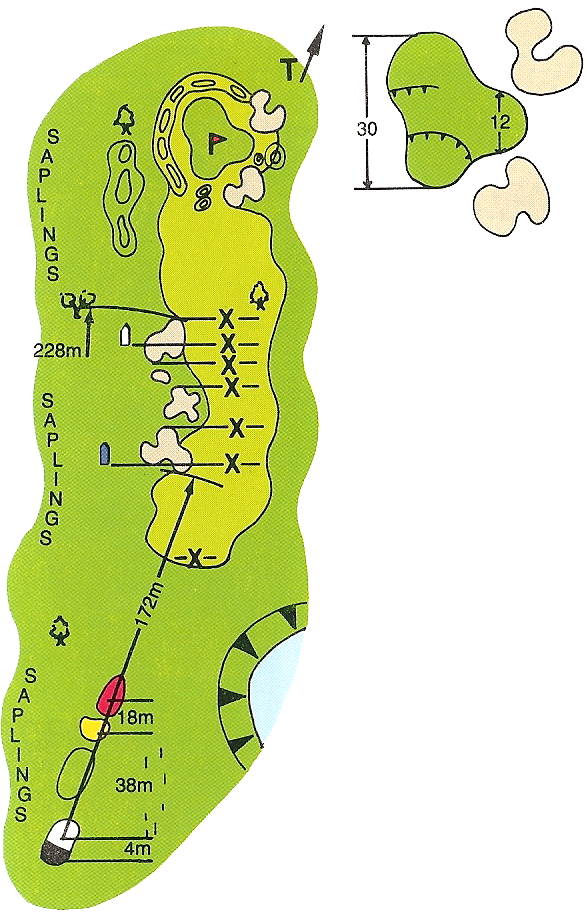
Hole 12
W: Par 4 – 302 M – Index 10
M: Par 4 – 362 M – Index 10
Open up the green for the 2nd shot with a drive at the left hand tree.
A small green with water right and back and bunkers left call for a smooth, accurate shot in.
Green has many swales – carefully check the putting line.
Hole 13
W: Par 3 – 124 M – Index 16
M: Par 3 – 163 M – Index 12
You MUST be up and allow for any cross wind or the water will claim your ball.
Best line is right centre green, the ball tends to roll left.
A bunker right traps any underhit shop on this line through.
Be long if anything and rely on two putts.
Hole 14
W: Par 4 – 305 M – Index 4
M: Par 4 – 373 M – Index 2
Left centre fairway is the driving line avoiding bunkers right.
Second shot uphill, with the ‘valley of sin’ front green one club extra is a must to be up.
An overhit shot will generally roll back onto the green.
Green slopes back to front – BEWARE the overhit downhill putt.
Hole 15
W: Par 4 – 288 M – Index 12
M: Par 4 – 334 M – Index 14
Big hitters can clear the first fairway bunkers but a safer driving line is over its right hand edge.
Only a fairway wood needed here, the fairway slope will give you extra run.
ANother green with noticable slopes where a downhill putt can get away from you.
Hole 16
W: Par 4 – 340 M – Index 6
M: Par 4 – 382 M – Index 6
Don’t be frightened of the water in view, it’s a long way away and a well hit drive towards it takes the left hand bunker out of play and opens up the large green.
Steep slopes behind the green will punish any overhit second shot.
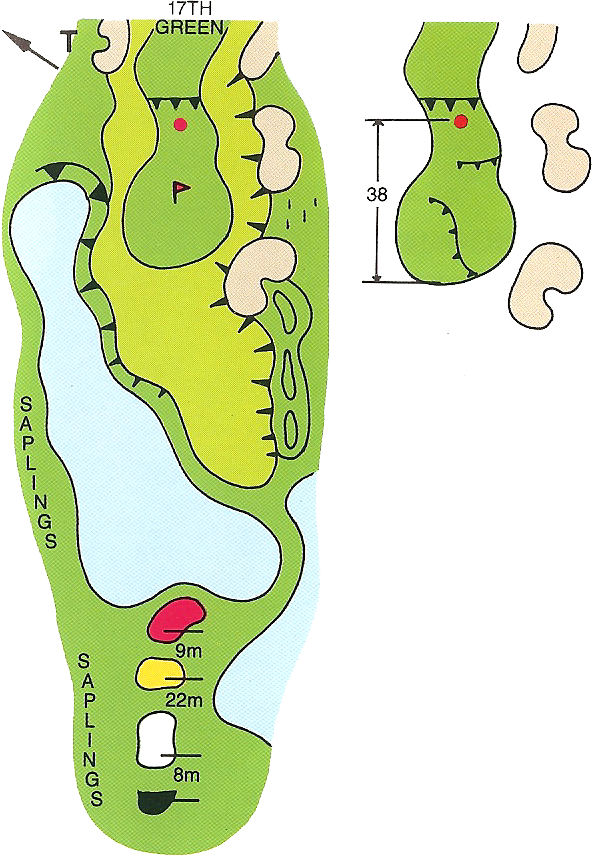
Hole 17
W: Par 3 – 140 M – Index 18
M: Par 3 – 182 M – Index 16
Hard to see this green from the back tees.
Check wind and day’s tee position for club selection.
Line is the tree over the water.
A straight shot is required, swing smoothly and don’t press.
Short and left is all trouble.
Hole 18
W: Par 5 – 378 M – Index 2
M: Par 5 – 457 M – Index 8
Fairway bunkers are all in range – you must centre your drive.
The ONLY safe second shot is a lay up centre fairway leaving a short iron shot in.
Beware hidden bunker right side of green.
With pin cut front green better go for back green and rely on two putts.